Want to know why your figure drawings look stiff and lifeless? You're probably skipping the fundamentals that separate amateur sketches from professional work. Drawing convincing human figures isn't about tracing outlines—it's about understanding the machinery underneath.
Most artists jump straight to copying photos without grasping how joints actually articulate, where weight truly settles, or why certain poses feel instantly wrong. This guide walks you through the practical knowledge working illustrators rely on daily, from skeletal landmarks that anchor every pose to the optical tricks that make foreshortened limbs believable.
Understanding Human Anatomy for Figure Drawing
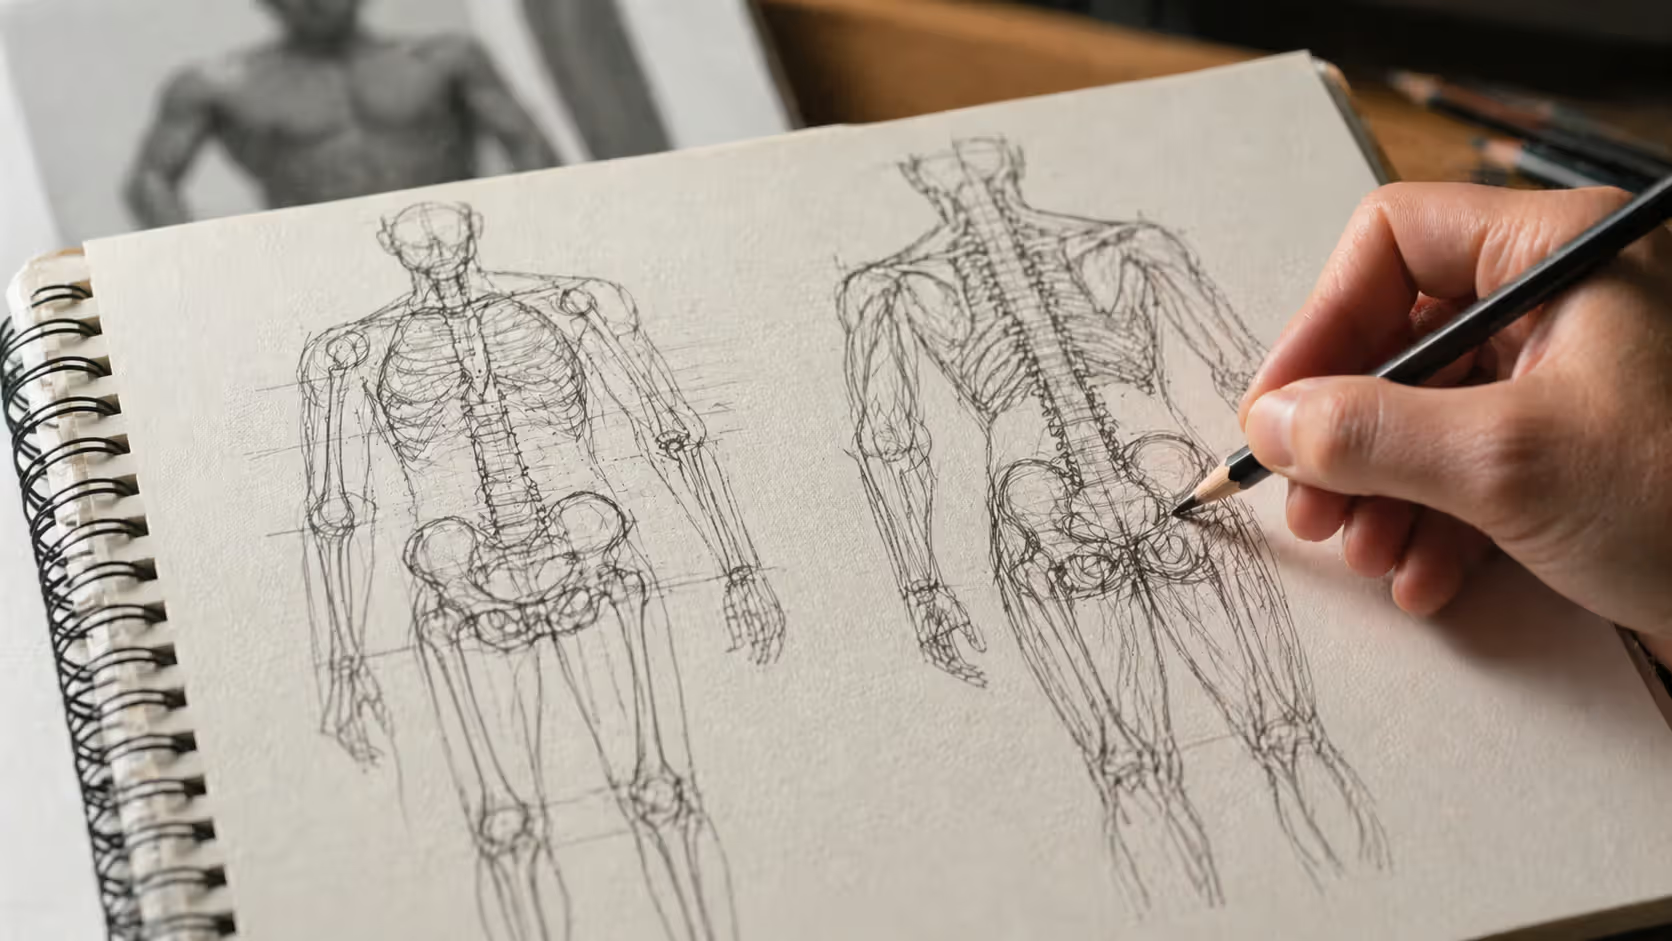
Your skeleton determines everything. Before you worry about abs or biceps, nail down these landmarks: where collarbones meet at the throat's base, how shoulder joints cap the torso, the rib cage's egg-like volume, the pelvis as a separate rigid bucket, plus elbows, wrists, knees, and ankles.
These points stay visible regardless of someone's build. They prevent the amateur mistake of arms that seem glued onto the torso as an afterthought.
The classic 7.5-head-tall proportion puts the pubic bone at the figure's midpoint—not the belly button like most beginners assume. When arms dangle relaxed, elbows hit roughly where your navel sits. Fingertips reach about mid-thigh. But real people break these "rules" constantly.
Muscles shape the surface where they bulk up or stretch taut. The trapezius creates that neck-to-shoulder slope everyone recognizes. Deltoids give shoulders their rounded cap. Pecs and lats define the upper torso's landscape. In legs, quads and calves create the major bulges.
Skip memorizing every muscle's Latin name. Instead, learn functional pairs: flexors contract to bend joints while extensors straighten them. When someone reaches forward, their triceps (extensor) activates and shows definition while the biceps (flexor) goes soft. Understanding this cause-and-effect prevents the bodybuilder-catalog look where every muscle inexplicably flexes at once.
Human anatomy for artists differs completely from medical textbooks. You're identifying shapes visible from outside, not cataloging organs. A simplified three-part torso—ribcage box, pelvis box, bendy spine between them—gets you further than memorizing vertebrae counts.
Author: Marcus Ellery;
Source: crafterholic.com
Gesture Drawing Techniques for Capturing Movement
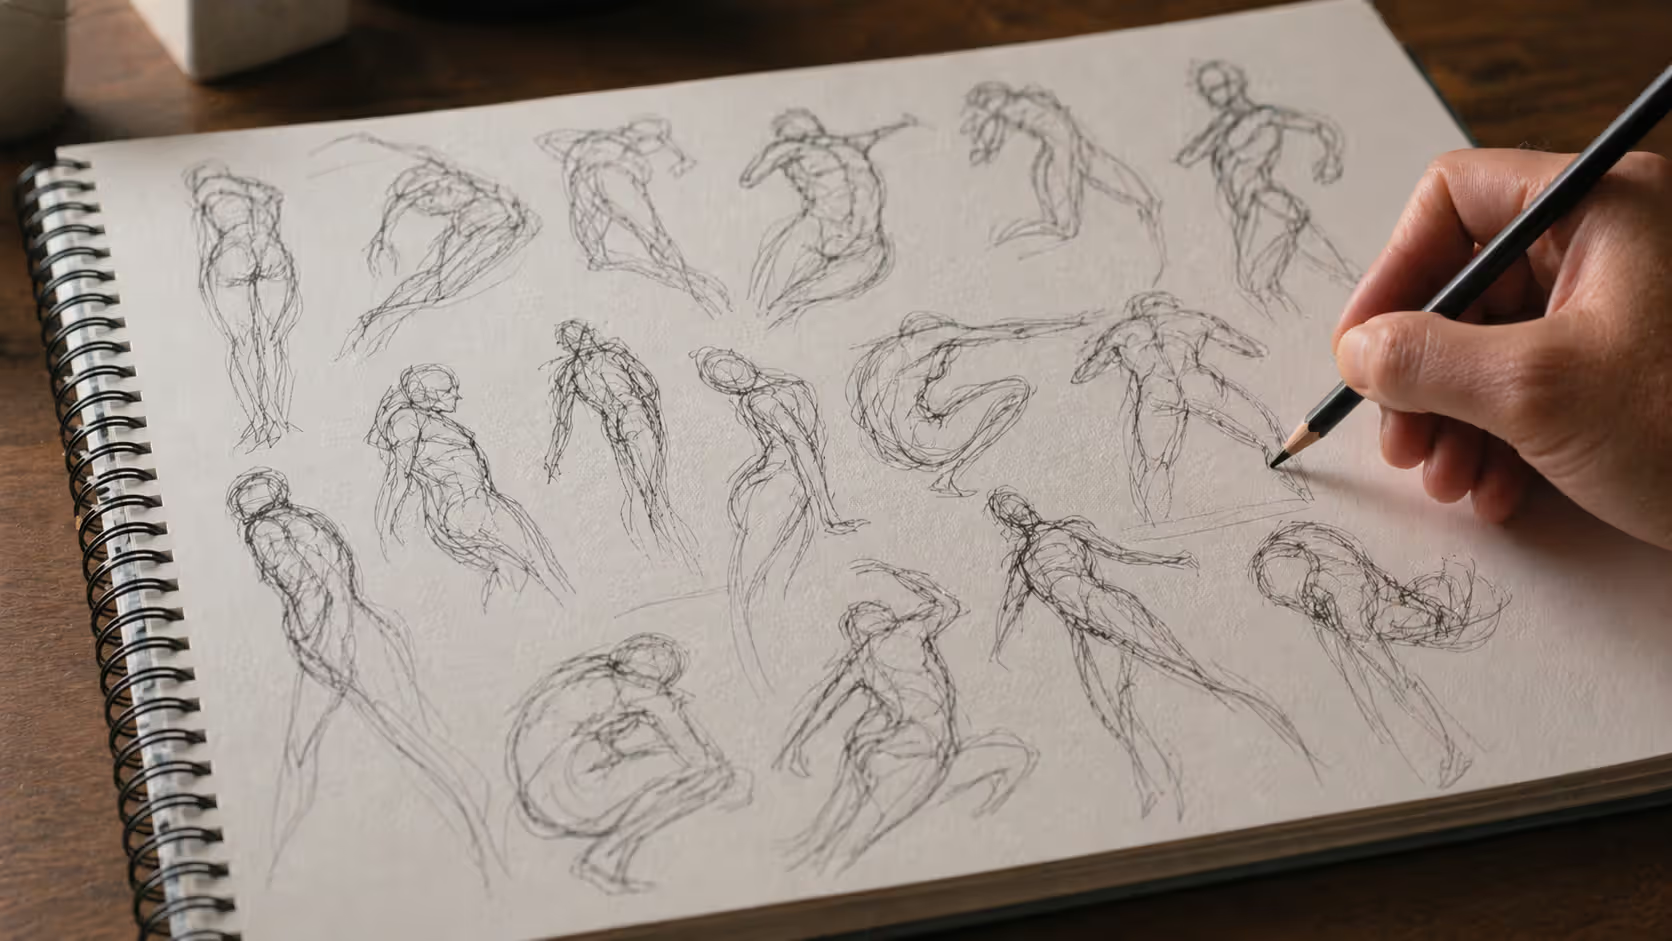
Gesture studies capture a pose's soul in 30 seconds to maybe two minutes. You're recording flow and energy before your analytical brain starts nitpicking proportions.
Find the line of action first: one sweeping curve running from head through the torso to the feet. A sprinter might show a sharp C-curve. Someone standing casually might display a gentle S-wave. This single line establishes rhythm before you add any body parts.
Think big shapes first, details never. Torso gets a bean or egg shape. Pelvis gets another blob. Connect them with the spine's gesture. Limbs become simple direction lines or tapered sweeps. That leg? Just a flowing stroke from hip to floor—kneecaps come later if there's time.
Set a timer for 60 seconds and force yourself to capture the complete figure. When it buzzes, move on whether you're happy or not. This constraint trains your eye to grab what matters: overall character, not rendering quality.
Expressive human poses usually break symmetry hard. One shoulder rides higher, weight crushes down through one leg, the head tilts opposite the hip's thrust. These mismatches suggest a living moment instead of a mannequin in shrinkwrap.
Ditch the tentative chicken-scratch where you make twelve light marks hoping one accidentally lands right. Commit to each stroke. Wrong line? Make a new confident stroke instead of scribbling over the mistake. Bold errors teach more than timid hedging.
Author: Marcus Ellery;
Source: crafterholic.com
Weight Distribution and Balance in Human Poses
Gravity doesn't take breaks. The body's center of mass (roughly at navel height when standing) must hover over the support base or the person's falling.
In a basic stand with even weight, that center point sits between both feet. But interesting poses dump weight primarily onto one leg or capture mid-action moments that temporarily defy balance.
Weight on one leg makes that leg straighten to bear the load. The relaxed leg can bend slightly. The pelvis tilts—the weight-bearing side rises as that hip bone supports everything above. Shoulders typically counter-tilt to maintain overall balance, creating that characteristic S-curve through the spine.
What Is Contrapposto and How to Use It
Contrapposto (Italian for "counterpoise") puts most weight on one leg while the other chills. This generates opposing angles: right hip lifts to support weight, right shoulder typically drops, and everything reverses on the left side.
Classical sculptors weaponized this technique to energize static marble. Check Michelangelo's David—weight crushes through the right leg, left leg relaxes forward, right hip elevated, left shoulder slightly higher.
To nail contrapposto: decide which leg carries the load. Draw that one straighter and more vertical. Tilt the pelvis up on that side. Curve the spine to bring the ribcage back toward center. Counter-tilt those shoulders to keep the head over the balance point. Now the relaxed leg can bend, cross, or extend without bearing much load.
This pose injects life into otherwise boring standing figures. The person looks like they could shift weight and walk away any second.
Drawing Weight Shifts in Dynamic Poses
Action shots frequently show the center of mass venturing outside the foot placement—which works because momentum or the next footfall will prevent collapse.
A sprinter mid-stride leans way forward, their center of mass ahead of the planted foot. That forward leg swinging through will land and catch everything, converting the controlled fall into forward motion. Draw that same lean on someone just standing there? Looks broken, because there's no momentum justifying the imbalance.
Someone lifting something heavy shifts their center toward the weight. The body leans back when pulling forward, or bends forward when deadlifting, keeping the combined center over both feet.
Watch for these weight mistakes: - Both legs equally straight in a relaxed stand (instant mannequin stiffness) - Pelvis staying level when weight clearly shifts - Head floating way outside the foot placement without momentum to explain it - Weight apparently on the toe-ball but the heel drawn as the lowest point
Foreshortening and Perspective in Figure Drawing
Foreshortening squashes any form aiming toward or away from your viewpoint. A leg extending directly at you looks dramatically shorter than its real length, with the foot appearing weirdly huge compared to the thigh.
The hardest part? Trusting your observation over your knowledge. Your brain insists that arm measures three head-lengths, but when pointing straight at you, it compresses to maybe just the hand plus a forearm sliver visible. Drawing what you "know" instead of what appears creates those flat, unconvincing poses.
Ellipses reveal foreshortening in cylindrical forms—arms and legs behave as cylinders. When a cylinder aims at you, you see more of the circular end cap—a fuller ellipse. When it runs parallel to the picture plane, you glimpse only the circle's edge—a thin ellipse or just straight sides.
Try drawing limbs at these angles: - Directly at you (extreme squashing, fat ellipses) - 45-degree angle (moderate compression) - Parallel to the picture plane (minimal squashing, skinny ellipses)
Overlapping parts clarify compressed space. Hand crosses in front of forearm, forearm crosses in front of upper arm. These overlaps guide the viewer through the squashed dimension. Skip them and that foreshortened arm reads as an ambiguous blob.
Foreshortening mistakes to avoid: making compressed forms too long (not believing the extreme squashing), drawing ellipses too narrow (ignoring the cylinder's rotation), and dodging foreshortened poses entirely because they're tough. That last one hurts your work most—foreshortening delivers drama and three-dimensionality that flat poses never achieve.
Creating Expressive and Dynamic Pose Compositions
Fill your figure with solid black. Does the pose still communicate? Can you tell the action, mood, or character? If that silhouette becomes an unclear blob, rethink your staging.
The line of action remains critical in finished pieces. Strong poses show a clear, readable flow—usually a C-curve or S-curve instead of a straight vertical. This invisible line creates visual rhythm and pulls the viewer's eye through the image.
Staging positions the figure relative to the viewer for maximum clarity. A pitcher throwing a baseball reads cleanest from the side profile, where you catch the wind-up, extended arm, and forward stride. Shoot from directly in front? Those elements stack and obscure each other.
Think about these compositional factors for dynamic pose work: - Camera height: Shoot from below (worm's-eye) and figures look powerful or threatening. Shoot from above (bird's-eye) and they can seem vulnerable or diminished. - Asymmetry: Symmetrical poses feel formal and static. Breaking symmetry in limbs, weight, or head angle injects energy. - Negative space: Shapes between and around the limbs matter as much as the limbs themselves. Interesting negative spaces strengthen composition. - Directional contrast: Torso leaning left while the arm extends right creates visual tension and interest.
Poses tell emotional stories. Closed positions—arms wrapped around torso, shoulders hunched, head dropped—suggest vulnerability, cold, or sadness. Open positions—chest forward, arms wide, head up—broadcast confidence, warmth, or joy. Someone reaching skyward feels aspirational; that same person crouched low feels defeated or cautious.
The best figure pose drawing guide is watching actual people. Notice how bodies telegraph emotion through subtle weight shifts, shoulder tension, and head position that staged photos often miss.
Drawing is not about copying what you see, but understanding what you're looking at. When you understand the structure—the gesture, the anatomy, the balance—you can draw anything from any angle, even from imagination.
— Glenn Vilppu
Common Mistakes When Drawing Human Poses
Stiffness has several culprits: drawing both sides identically, locking every joint straight, or copying references without understanding the underlying gesture. Fix it by exaggerating the line of action slightly and ensuring weight clearly shifts to one side in standing poses.
Proportion errors plague beginners who draw oversized heads (childhood habit) or stumpy limbs. Measure constantly using head-height units or comparative measurement (this distance equals that distance). Upper arm and forearm run roughly equal length; same for thigh and lower leg from knee to ankle.
Skipping anatomy produces limbs that float disconnected from the skeleton, muscles bulging in physically impossible configurations, or joints bending the wrong direction. You don't need every muscle, but you must grasp the skeletal framework governing how bodies can and cannot articulate.
Flat compositions happen when every pose uses the same three-quarter view at eye level. Mix up camera angles. Experiment with extreme perspectives. Shoot from directly overhead or below occasionally. Embrace foreshortening instead of running from it.
Mindless copying means tracing photo contours without understanding the structure underneath. Change the pose slightly and everything collapses because you never learned the underlying rules. Always start with gesture and structure, then refine toward the reference.
Premature detail work murders spontaneity. Spend an hour perfecting the head before sketching the body? You've locked yourself into that head size and position. Rough in the entire pose first, then refine all areas together.
Compressed body parts, multiple ground contacts, complex overlapping
Intermediate-Advanced
Perspective compression, weight across multiple points
Casual scenes, environment interaction, character depth
Frequently Asked Questions About Drawing Human Poses
How long should I spend on gesture drawing practice?
Commit 10-20 minutes daily to gesture work for steady improvement. Break it into short bursts: 30-second poses, then 60-second, then 2-minute studies. This focused repetition develops observational speed and trains your hand to grab essence over detail. Many pros warm up with gesture studies before longer sessions, treating it like musicians running scales before performing.
Do I need to study anatomy to draw good poses?
You need working anatomy knowledge—how the skeleton articulates and how major muscle groups affect surface contours. You don't need to memorize Latin names or draw flayed-muscle studies unless you're chasing hyperrealism. Learn enough to understand why shoulders bulge when arms raise, why knees look different from front versus side, and where the ribcage terminates relative to the waist. This prevents anatomical impossibilities and makes invented poses believable.
What are the best reference sources for human poses?
Live model sessions remain unmatched for learning actual three-dimensional form, though they're not always available. Solid alternatives: pose reference sites like Line of Action or Quickposes with timed sessions, figure drawing apps, and action sports photography. Don't lean too hard on single static photos—study video frames to grasp poses as moments within continuous movement. Mirror selfies work great for checking specific hand positions or fabric folds. Build a reference collection, but always analyze instead of mindlessly tracing.
How do I make my poses look less stiff?
Stiffness grows from symmetry and locked joints. Break symmetry deliberately—tilt the head, crush weight onto one leg, vary arm positions. Put slight bends in "straight" limbs; real bodies rarely lock joints completely except under strain. Push the line of action slightly beyond what your reference shows. Think about what the figure did one moment earlier and will do next—this before-and-after context suggests implied motion. Also loosen your drawing grip; tight, scratchy linework creates tight, rigid figures.
What is the difference between gesture drawing and figure drawing?
Gesture studies grab movement, energy, and essential action in quick bursts (30 seconds to maybe 2 minutes), putting flow above accuracy. Figure drawing covers longer sessions focused on proportion, anatomy, lighting, and rendering—often 20 minutes to several hours. Gesture sees and records the pose's spirit; figure drawing constructs and refines the form. These skills feed each other: gesture training injects liveliness into your figure work, while anatomical knowledge from figure study makes gestures structurally sound.
Should I use photo references or draw from life?
Each serves distinct purposes. Life drawing teaches three-dimensional seeing, lets you walk around forms to assess from multiple angles, and shows how light wraps around actual volume. Photos flatten depth and introduce lens distortion, but they're convenient and freeze action poses impossible to hold. Build foundational skills through life drawing, then add photo references for specific poses, lighting scenarios, or details. Never trace photos without grasping the underlying structure—you'll learn nothing and develop dependency instead of skill.
Getting good at human pose drawing builds on layers: anatomy establishes structural rules, gesture captures living energy, weight distribution grounds figures in believable physics, and compositional choices communicate emotion and story. Each element reinforces the others—anatomical knowledge makes your gestures structurally solid, while gesture practice prevents anatomical studies from becoming rigid diagrams.
Improvement comes through deliberate practice mixing quick gesture sessions with longer anatomical studies. Analyze poses you admire in artwork, photography, and daily observation. Ask why a pose works: Where's the weight crushing down? What's the line of action doing? How does perspective compression enhance the staging?
This figure pose drawing guide provides frameworks, but your observation and practice transform frameworks into actual skill. Start with simple standing poses, add contrapposto weight shifts, then gradually tackle perspective compression and dynamic action. Each pose you draw—whether it works or fails—teaches something about how bodies move, balance, and express the full spectrum of human experience through position and gesture.
Master the wheatpaste street art technique with this complete guide covering adhesive recipes, poster installation methods, material selection, and legal considerations. Learn to create durable wheat paste art installations using affordable supplies and proven application techniques.
Perspective is the set of techniques artists use to represent three-dimensional space on a flat surface. It governs how objects appear smaller as they recede, how parallel lines converge toward a single point, and how atmospheric conditions affect color and clarity across spatial planes.
Learn to draw compelling three quarter view portraits with this comprehensive guide covering proportions, perspective, and step-by-step techniques. Discover why this angle creates depth and dimension, master foreshortening, and avoid common mistakes that flatten your portraits.
Stippling creates stunning artwork using only dots. This comprehensive guide covers everything from basic dot shading methods to advanced illustration techniques, including tool recommendations, step-by-step tutorials, and common mistakes to avoid.
The content on this website is provided for general informational and educational purposes only. It is intended to explain concepts related to digital design, visual art, color theory, art techniques, design principles, and design history.
All information on this website, including articles, guides, and examples, is presented for general educational purposes. Creative outcomes may vary depending on individual skill, tools, and practice.
This website does not provide professional design services or guarantee results, and the information presented should not be used as a substitute for formal education or professional consultation.
The website and its authors are not responsible for any errors or omissions, or for any outcomes resulting from decisions made based on the information provided on this website.