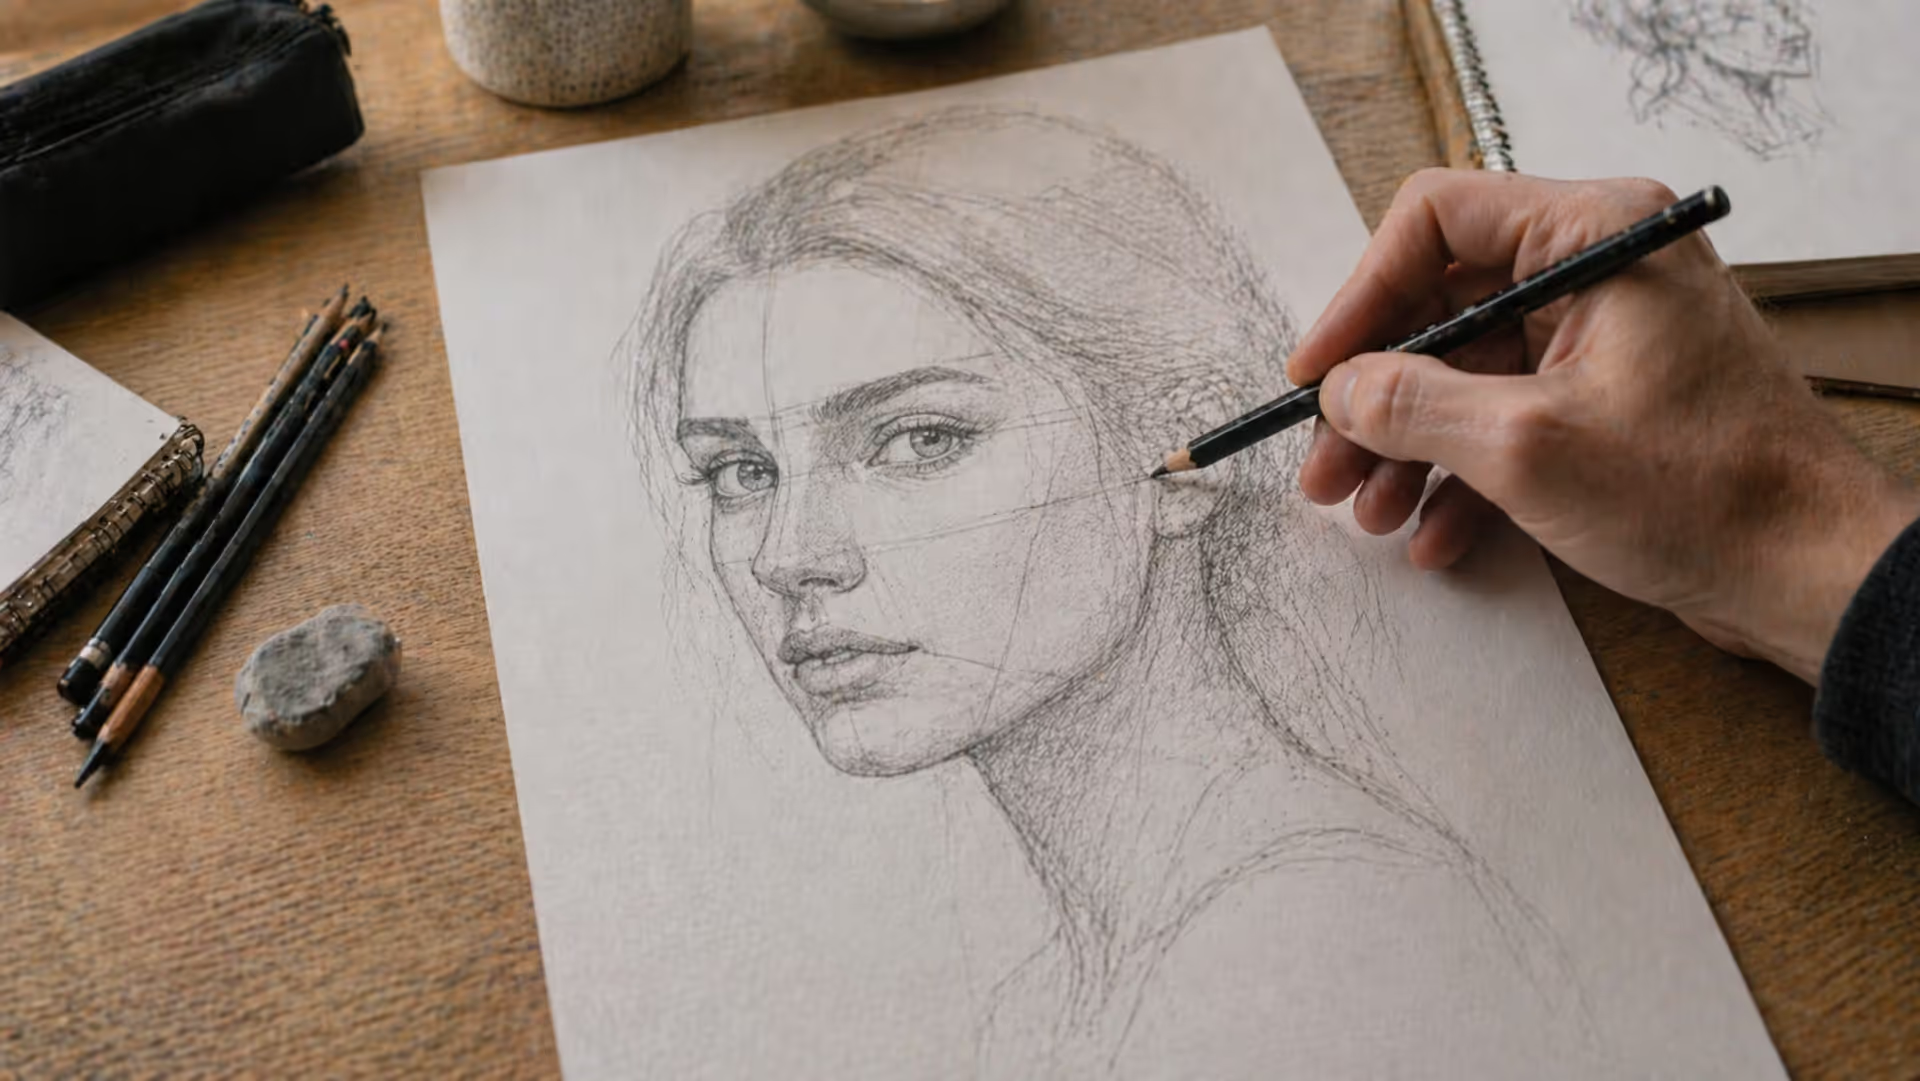
The three quarter view stands as one of the most challenging yet rewarding angles in portrait drawing. Unlike the straightforward symmetry of a frontal view or the simplified silhouette of a profile, this angle demands that artists wrestle with foreshortening, asymmetry, and spatial depth—all while maintaining recognizable likeness and proportion.
Mastering this perspective opens doors to more dynamic character work, whether you're sketching from life, designing characters for animation, or building a portfolio of figure studies. The angle reveals personality and dimension in ways that flatter poses cannot, making it essential knowledge for anyone serious about portraiture.
What Is a Three Quarter View in Portrait Drawing
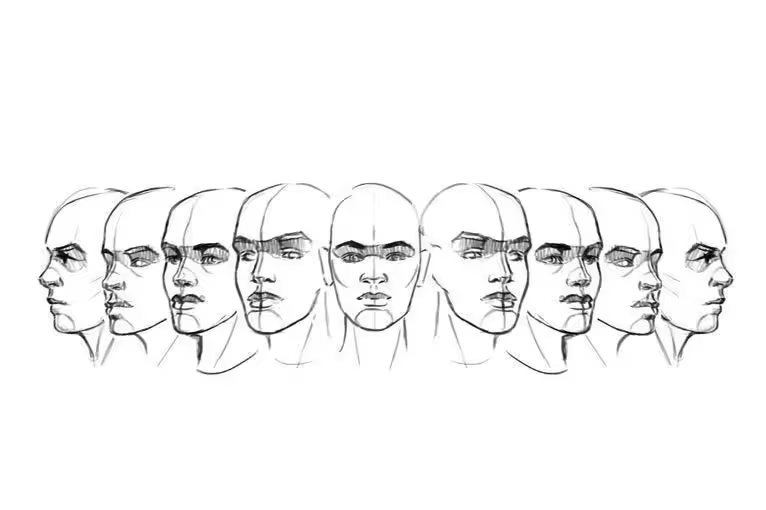
A three quarter view captures the head rotated approximately 30 to 45 degrees away from the viewer, showing roughly three-quarters of the face while the remaining quarter turns away. You see both eyes, but one appears narrower and closer to the edge of the face than the other. The nose breaks the contour of the far cheek, and the far side of the face compresses due to perspective.
The term "three quarter" doesn't refer to a precise mathematical measurement. Instead, it describes the visible portion of the face—more than a profile (which shows exactly half) but less than a frontal view (which shows the full face symmetrically). Think of it as the face turned just enough that the far ear becomes barely visible or hidden entirely, while the near ear sits prominently on the side of the head.
This angle differs fundamentally from both profile and frontal views in how features align. In a profile, features stack in a linear sequence with no overlap. In a frontal view, features mirror across a central axis. The face in three quarter view, however, creates overlapping forms where the nose crosses over the far cheek, the far eye nestles closer to the nose bridge, and the center line of the face curves away from the viewer.
Artists sometimes confuse this view with a simple head tilt. A tilted head maintains frontal symmetry but angles up or down. A true three quarter portrait drawing involves rotation—the head turns on its vertical axis, fundamentally changing which surfaces face the viewer.
Author: Marcus Ellery;
Source: crafterholic.com
Why Artists Use the Three Quarter Angle
The character three quarter angle creates depth that frontal views cannot achieve. When the face turns, overlapping planes emerge: the forehead recedes, the cheekbone projects forward, the jaw curves back into space. These layered surfaces catch light differently, producing gradations that describe three-dimensional form.
This depth translates to more natural, lifelike portraits. People rarely stand perfectly frontal in conversation or candid moments. We turn our heads constantly, creating the subtle angles that the oblique portrait technique captures. A portrait at this angle feels less posed, more caught in a moment of genuine expression.
Emotional connection strengthens when viewers can read both the direct gaze of the near eye and the partial concealment of the turned face. This combination of revelation and mystery engages viewers more than the full disclosure of a frontal view or the complete withholding of a profile.
For character designers, the angle offers versatility in establishing personality. A character sketched in three quarter view immediately suggests awareness of something beyond the frame. The turn implies reaction, thought, or interaction with an unseen element—storytelling built into the composition itself.
Portrait composition angles matter enormously in professional work. Editorial illustrators favor this view because it fits rectangular formats better than profiles while offering more visual interest than frontal symmetry. Animation model sheets include three quarter angles as standard turnarounds because they reveal how facial features relate spatially, helping other artists maintain consistency.
The angle also forgives certain facial asymmetries that frontal views emphasize. A slightly uneven eye placement or asymmetrical jaw becomes less obvious when perspective naturally creates different sizes and positions for features on the near versus far side.
Face Proportions in Three Quarter View
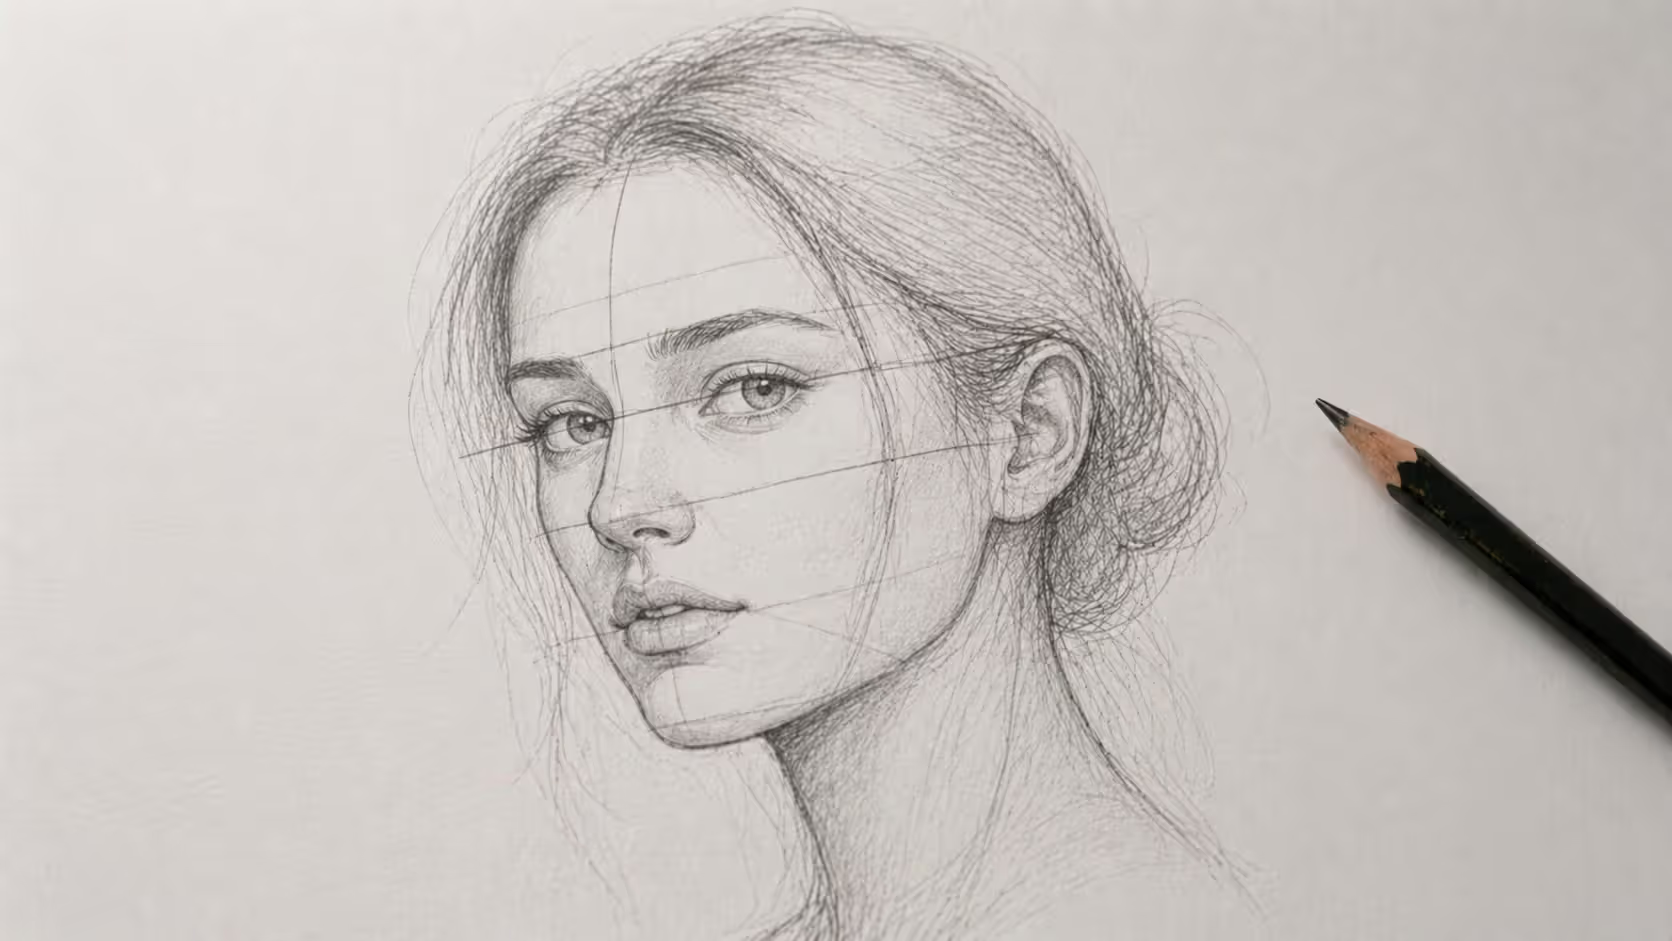
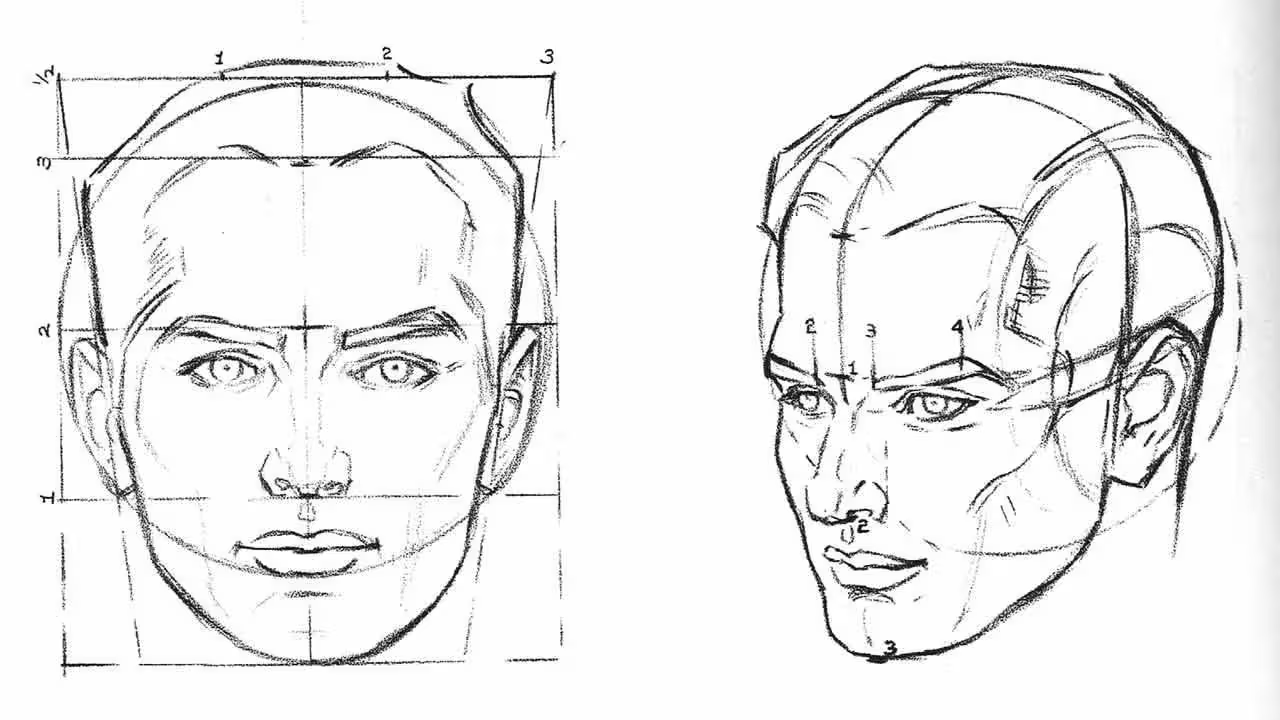
Standard facial proportions—eyes halfway down the head, nose halfway between eyes and chin, mouth one-third of the way from nose to chin—still apply in three quarter view, but perspective warps their application. The center line that divides the face no longer runs straight down the middle of your drawing surface. Instead, it curves to follow the rounded form of the head, sweeping from the forehead down through the nose and chin, then disappearing around the far side.
This curved center line becomes your primary reference. Everything else positions relative to it. The far eye sits much closer to this center line than the near eye. The far side of the mouth compresses, showing less width than the near side. The far nostril may barely show, while the near nostril appears clearly defined.
Foreshortening affects horizontal measurements more than vertical ones. The distance between the eyes compresses on the far side. The width of the far cheek shrinks compared to the near cheek. Meanwhile, vertical proportions—the distance from hairline to brow, brow to nose base, nose base to chin—remain relatively consistent, though the curved center line means you measure these along a curve rather than a straight line.
Symmetry disappears entirely. Features that mirror perfectly in frontal view now appear in different sizes, shapes, and positions. The far eye becomes narrower, showing less of the white and appearing closer to an almond shape even if the near eye looks round. The far eyebrow shortens. The far side of the mouth shows less of the lip.
Author: Marcus Ellery;
Source: crafterholic.com
Key Differences from Front View Proportions
The most striking difference lies in eye width and spacing. In frontal view, you can typically fit five eye-widths across the face—one eye, one space, one eye, one space, one space. In three quarter view, this measurement becomes meaningless because the far eye compresses to perhaps half the width of the near eye.
The nose shifts from centered to offset. Its bridge aligns with the curved center line, but the tip extends toward the near side of your drawing. The far nostril tucks behind the bridge, often showing only as a small shadow or not at all. The near nostril opens more fully to view.
Ear placement confuses many artists transitioning from frontal studies. In front view, ears sit on the sides of the head, aligned vertically with the space between eyes and nose. In three quarter view, the near ear moves toward the edge of your composition, appearing larger due to proximity. The far ear either barely peeks around the curve of the head or vanishes completely, depending on the degree of rotation.
The jawline creates an asymmetrical curve. The near side sweeps in a gentle arc from chin to ear. The far side shows a sharper, more compressed curve before disappearing behind the turned head. Beginning artists often draw both sides of the jaw with equal curves, flattening the sense of rotation.
Common Proportion Mistakes to Avoid
Placing both eyes equidistant from the center line destroys the three quarter effect. Your brain wants symmetry, but resist it. The far eye must nestle much closer to the curved center line, sometimes appearing to touch the bridge of the nose.
Drawing the far eye the same size as the near eye ranks as the second most common error. Perspective makes distant objects smaller, and the far side of the face sits farther from the viewer than the near side. Shrink that far eye by roughly 20-30% in width, depending on the degree of turn.
Ignoring the skull beneath the face leads to flat, unconvincing portraits. The head is a sphere with features attached to its surface. When that sphere rotates, features follow its curvature. Drawing features as if they sit on a flat plane, just rearranged asymmetrically, creates a face that looks broken rather than turned.
Overextending the far side of the face adds unwanted width. When the head turns away, you see less of the far side, not more. The temptation to show "enough" of that far cheek results in heads that look too wide, as if viewed from a higher angle than intended.
Misaligning the features vertically happens when artists forget that the curved center line still governs vertical relationships. The inner corner of the far eye, the far nostril, and the far corner of the mouth should all align along that curve, maintaining the same spatial relationships they'd have in frontal view, just wrapped around the form.
Step-by-Step Guide to Drawing a Face at Three Quarter Angle
Author: Marcus Ellery;
Source: crafterholic.com
Drawing the head at angle requires methodical construction. Rushing to features before establishing the underlying structure guarantees proportion problems that become harder to fix as you progress.
Setting Up Your Initial Guidelines
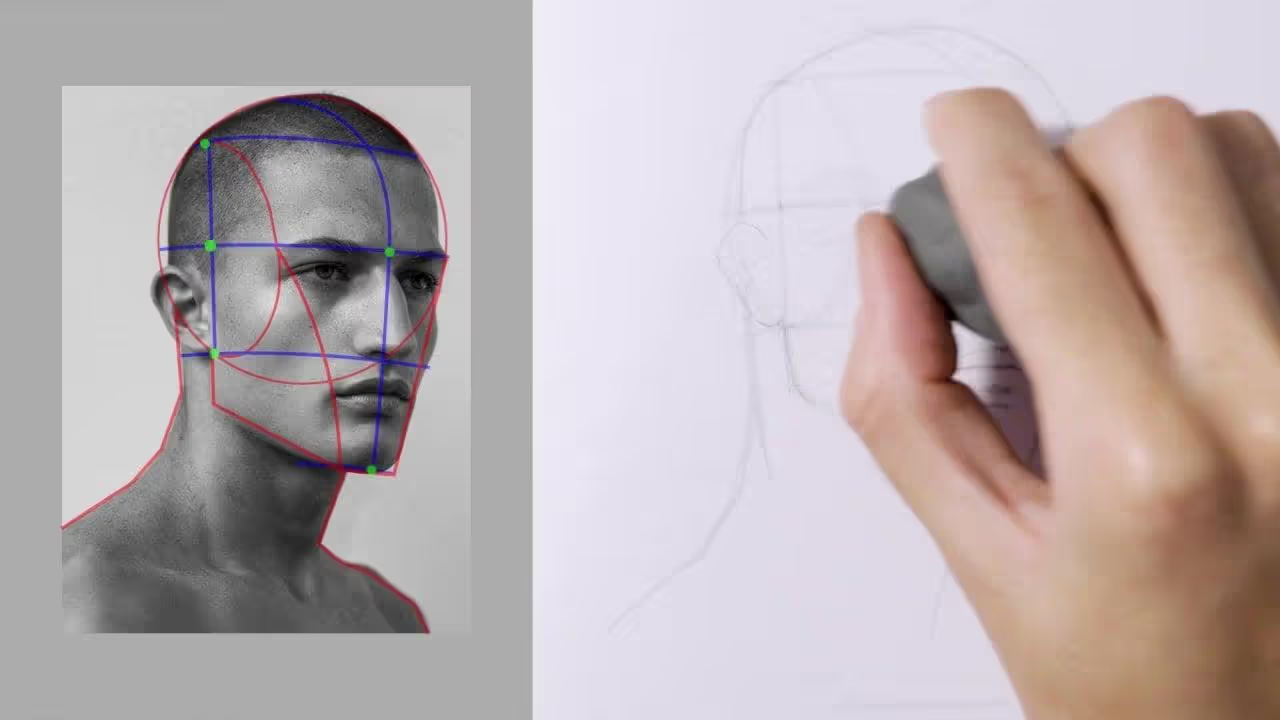
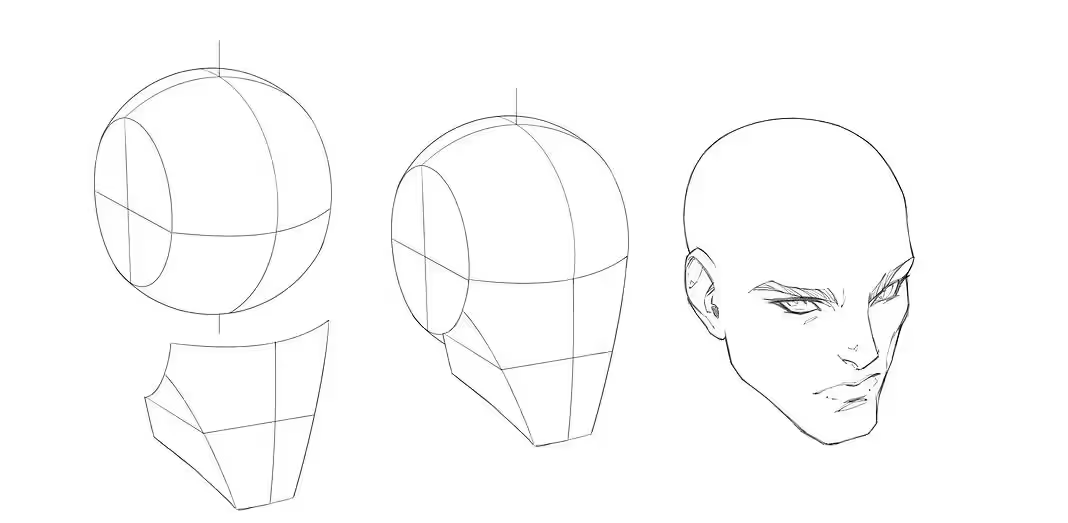
Start with a circle representing the cranium. This circle accounts for roughly two-thirds of the total head height—the skull from crown to approximately ear level. Below this circle, add the jaw structure, which extends the head by another third.
Draw a vertical line through the circle, but curve it to show rotation. This curved line represents the center of the face. For a moderate three quarter view, curve it so it sits about one-third of the way in from the edge of the circle on the side facing you. The more extreme the rotation, the closer this line moves toward the edge.
Add a horizontal line halfway down the circle for eye placement. This line should also curve slightly, following the spherical form of the head. Where it intersects your vertical center line marks the bridge of the nose.
Divide the lower half of the head (from the eye line down) into thirds. The first third marks the bottom of the nose. The second third indicates the mouth line. These divisions help maintain proper vertical spacing as you add features.
Sketch a light line from the top of the circle down past the jaw on the side facing you. This represents the front plane of the face. Another line from the center curve to the far edge of the circle shows where the face turns away. These planes help you understand which surfaces face the viewer and which turn aside.
Placing the Eyes, Nose, and Mouth
Position the near eye on the horizontal eye line, about one eye-width from the edge of the face. Draw it at full size with whatever shape suits your subject—almond, round, hooded, or wide.
The far eye sits on the same horizontal line but much closer to the curved center line. Make it narrower than the near eye, compressed by perspective. The inner corner should nearly touch the center line. The outer corner extends only slightly beyond it, showing perhaps half the width of the near eye.
For the nose, start at the bridge where your vertical and horizontal guidelines intersect. The bridge aligns with the curved center line, running down to the nose base at your one-third division. The nose tip projects slightly toward the near side of the face. Draw the near nostril clearly, showing its full form. The far nostril either appears as a small wedge or hides completely behind the bridge, depending on your rotation angle.
The mouth centers on the vertical guideline at your two-thirds division. The near half of the mouth shows more detail—you can see more of the lip contour, more of the corner of the mouth. The far half compresses, showing less width and less detail. The mouth line curves slightly to follow the cylindrical form of the lower face.
Place the pupils carefully. In three quarter view, both pupils should align with the nose tip when the subject looks directly at the viewer. This alignment helps sell the direction of gaze and maintains the relationship between features.
Drawing the Ears and Jawline
The near ear sits on the side of the head, aligned vertically between the eye line and the nose base. In three quarter view, you see the full structure of this ear—the outer helix, the inner curves, the lobe. Place it far enough back on the head that it doesn't crowd the eye; the ear attaches behind the halfway point of the skull when viewed from the side.
The far ear may or may not appear, depending on rotation. For a moderate three quarter angle (around 30-35 degrees), you'll see just the front edge of the far ear peeking around the curve of the head. For more extreme angles (40-45 degrees), the far ear disappears entirely behind the head mass.
The jawline starts at the chin, which sits on your vertical center line at the bottom of the head. From the chin, the jaw curves back toward the near ear in a smooth arc. This curve should feel natural, following the bone structure beneath. Common mistakes include making this curve too straight (creating a flat jaw) or too sharp (creating an angular, masculine jaw on a character meant to appear soft).
The far side of the jaw curves more sharply from chin to the point where it disappears behind the turned head. You see less of this curve—perhaps only the first third before it vanishes. Don't extend it too far; the far jaw should disappear well before reaching the position where you'd expect an ear.
Connect the jaw to the ear with the muscle and tissue of the neck and lower face. This connection varies by body type and age, but generally follows the sternocleidomastoid muscle from behind the ear down to the clavicle. In three quarter view, you see more of the near side of the neck than the far side.
Perspective and Foreshortening in Three Quarter Portraits
Author: Marcus Ellery;
Source: crafterholic.com
Perspective face drawing applies the same principles that govern architectural drawing or landscape work: objects farther from the viewer appear smaller, parallel lines converge toward vanishing points, and forms recede into space.
In portraits, the head acts as your primary form in space. When it rotates, the far side recedes from your viewpoint while the near side advances. This recession causes foreshortening—the compression of forms along the line of sight. The far cheek, far eye, and far side of the mouth all compress because you're viewing them at an oblique angle rather than straight-on.
Think of the face as composed of planes: the front plane (forehead, nose, upper lip, chin), the side planes (temples, cheeks, jaw), and the transitional planes that connect them (the curves around the eye sockets, the slope from cheek to jaw). In frontal view, you see primarily the front plane with slight hints of side planes. In profile, you see one complete side plane. In three quarter view, you see the front plane plus significant portions of one side plane, with all the transitional planes creating depth between them.
The oblique character view requires understanding how these planes catch light. The front plane typically receives the most direct light. The near side plane receives moderate light at an angle. The far side plane, turning away from both viewer and light source, falls into relative shadow. This three-value structure—light front, medium near side, dark far side—creates the illusion of a rounded, three-dimensional form.
Features on the far side of the face don't just shrink; they also shift in apparent position. The far eye appears to move upward slightly compared to the near eye, even though they sit on the same horizontal plane in reality. This happens because you're viewing the far eye from an angle, seeing more of its lower lid and less of its upper lid. The same principle applies to the far eyebrow, far nostril, and far side of the mouth—all appear to shift position based on your viewing angle.
Handling the far side of the face separates competent three quarter portraits from masterful ones. Weak drawings either show too much of the far side (as if the head were wider than it is) or too little (making the head look unnaturally narrow). The correct amount depends on your specific rotation angle, but a reliable rule suggests that the far side should occupy roughly one-third of the total face width for a typical three quarter view.
The edge where the face turns away from view—called the terminator in lighting terms or the form shadow edge in drawing—creates a critical boundary. Features should not extend beyond this edge. The far eyebrow, far eye, and far cheekbone all stop at or before this turning edge. Extending them past it makes the face look flat rather than rounded.
Three Quarter View Reference and Practice Tips
Author: Marcus Ellery;
Source: crafterholic.com
Working from life provides the best training for understanding this angle. Position a mirror at your workspace and practice drawing your own face turned to various degrees. You can check proportions instantly, see how features relate spatially, and observe how light describes form on a real three-dimensional surface.
Photo references offer convenience and consistency. When selecting reference photos, choose images with clear lighting that reveals form. Flat, frontal lighting hides the dimensional information you need to learn from. Three-quarter lighting—where the light source sits at roughly 45 degrees to the subject—works well because it creates shadows that describe the planes you're trying to draw.
Digital tools in 2026 include 3D head models that you can rotate to any angle. Programs like Blender (free) or character design software offer base head models. Rotating these models helps you understand the geometry of the face from any angle. However, don't rely on them exclusively; real faces have subtle asymmetries and variations that generic models lack.
Practice exercises build skill systematically. Start with simple geometric forms—draw a sphere with a curved center line and practice wrapping features around it. Graduate to skull studies, which reveal the bone structure underlying facial features. Then move to live subjects or quality photo references.
The Loomis method, developed by illustrator Andrew Loomis, provides a structured approach to constructing heads at any angle. This method uses a sphere for the cranium, adds a wedge for the jaw, and provides guidelines for feature placement. While initially complex, it becomes intuitive with practice and works reliably for three quarter views.
Gesture drawing sessions that include portraiture help you capture the three quarter angle quickly without overthinking. Set a timer for two minutes and sketch someone's face from a three quarter angle, focusing on capturing the overall relationships rather than details. Repeat with different subjects and rotation angles. This builds visual memory and loosens up your approach.
Study master drawings from artists who excelled at this angle. Holbein's portrait drawings demonstrate impeccable proportion in three quarter view. John Singer Sargent's charcoal studies show how to suggest form with minimal lines. Contemporary artists like Craig Mullins and Karla Ortiz create compelling three quarter portraits in digital media, offering insights into modern approaches.
View Type
Visibility of Features
Difficulty Level
Best Use Cases
Common Challenges
Front View
Both eyes equal, full nose, symmetrical mouth, both ears equally visible
Beginner-friendly
Portraits emphasizing symmetry, identification photos, formal portraits, character turnarounds
Can appear flat or static, less dimensional interest, emphasizes facial asymmetries
Three Quarter View
Both eyes visible but different sizes, nose breaks cheek line, asymmetrical mouth, one ear prominent
Intermediate to advanced
Dynamic portraits, character design, editorial illustration, candid studies
Foreshortening, asymmetrical proportions, curved center line, far-side compression
Profile View
One eye, nose silhouette, one ear, no mouth depth visible
Moderate
Cameos, coins, silhouettes, emphasizing nose or jaw structure
Limited expression, no eye contact with viewer, difficult to show both eyes' character
The three quarter view is where portraiture truly becomes three-dimensional. You're not just recording features—you're describing a form that exists in space, that could rotate further if it chose to. That implied potential for movement, for life, makes all the difference between a diagram of a face and an actual portrait.
— Sarah Sedwick
Common mistakes extend beyond proportion errors. Many artists draw features in isolation rather than as parts of a unified form. They'll draw a perfectly rendered eye, then another perfectly rendered eye, then a nose, then a mouth—but these features won't relate to each other spatially. They'll sit on the surface like stickers rather than emerging from an underlying structure.
Another frequent issue: inconsistent perspective. An artist might foreshorten the far eye correctly but draw the far ear at full size, or compress the far cheek but extend the far jaw too wide. Every element must follow the same perspective rules or the face looks broken.
Overworking the far side of the face creates flatness. Because the far side turns away from view, it should receive less detail, lighter lines, and less contrast than the near side. Rendering it with equal attention fights against the perspective you're trying to create.
FAQ
What degree angle is a three quarter view?
A three quarter view typically ranges from 30 to 45 degrees of rotation from frontal. There's no single "correct" angle—the term describes a range where you see both eyes but the face clearly turns away from straight-on. At 30 degrees, you see substantial portions of both sides of the face. At 45 degrees, the far side compresses significantly and the far ear often disappears. Most portraits described as "three quarter view" fall around 35-40 degrees, where the asymmetry reads clearly but both eyes remain visible and expressive.
Is three quarter view harder to draw than front view?
Yes, for most artists. Front view offers symmetry as a built-in error-check—if something looks wrong on one side, you can compare it to the other. Three quarter view eliminates this safety net. You must understand perspective, foreshortening, and three-dimensional form rather than relying on mirroring. However, some artists find three quarter view easier because it's more forgiving of minor proportion errors; the expected asymmetry hides small mistakes that would be obvious in symmetrical frontal view. The difficulty also depends on your learning approach—artists who study construction and form first often find three quarter view more intuitive than those who start with feature-focused frontal studies.
How do you find the center line in a three quarter portrait?
Draw a curved line that follows the cylindrical form of the head from crown to chin, passing through the bridge of the nose. This line sits off-center on your drawing surface, positioned toward the side facing you. For a moderate three quarter view, place it roughly one-third of the way in from the near edge of the head. To test if your center line sits correctly, imagine the head rotating further—the center line should move smoothly toward the edge as rotation increases, or back toward the middle as rotation decreases. Features should distribute around this line: the far eye sits very close to it, the nose bridge aligns with it, and the mouth centers on it.
What's the difference between three quarter view and 45-degree angle?
These terms often overlap but aren't identical. "Three quarter view" describes how much of the face is visible—roughly three-quarters of the total face. "45-degree angle" specifies the exact rotation from frontal. A face rotated exactly 45 degrees typically qualifies as a three quarter view, but so does a face rotated 35 degrees or 40 degrees. The term "three quarter" offers flexibility, describing a range of angles rather than a precise measurement. In practice, most artists use the terms interchangeably when discussing portraits rotated between 30-45 degrees, where you see both eyes but the face clearly turns away from frontal.
How do you draw the far eye in three quarter view?
Make it narrower than the near eye—roughly 50-70% of the near eye's width, depending on rotation degree. Position it much closer to the center line of the face than the near eye; the inner corner should nearly touch the nose bridge. The far eye often appears slightly higher than the near eye due to perspective, though both actually sit on the same horizontal plane. Show less of the white of the eye on the far side. The eyelid curves may appear more compressed, creating a narrower, more almond-like shape even if the near eye looks round. Add less detail to the far eye—lighter lines, less contrast—to reinforce that it recedes into space.
Should beginners start with three quarter view or front view?
Front view offers an easier entry point for absolute beginners because symmetry provides immediate feedback about proportion errors. Learn basic facial proportions—eye placement, nose length, mouth position—in frontal view first. Once you can draw a reasonably proportioned frontal face, transition to three quarter view. This progression builds foundational knowledge before adding the complexity of perspective and foreshortening. However, don't spend too long on frontal views only; moving to three quarter view relatively early (after a few successful frontal portraits) prevents you from becoming dependent on symmetry and helps you understand faces as three-dimensional forms rather than collections of features.
The three quarter view portrait represents a milestone in any artist's development. It demands more than feature recognition or proportion memorization—it requires genuine understanding of the head as a three-dimensional form existing in space. The curved center line, the compressed far side, the foreshortened features—these elements combine to create depth, life, and presence that frontal views struggle to achieve.
Mastery comes through consistent practice with attention to underlying structure. Focus on the sphere of the skull, the curved guidelines that wrap around it, and the way features follow those curves. Study how light describes form, how the far side compresses, and how all features relate to the curved center line. Work from life when possible, use quality references when necessary, and analyze master works to see how skilled artists solve the challenges this angle presents.
The face angle drawing guide principles covered here—from initial construction through feature placement to perspective and foreshortening—provide a framework for approaching any three quarter portrait. Apply them systematically, but don't let method override observation. Every face differs slightly, and the best portraits balance structural knowledge with sensitivity to individual character.
Your journey with this angle won't end with technical competence. Even after you can draw proportionally accurate three quarter portraits, you'll continue discovering subtleties: how personality emerges through the specific angle of rotation, how emotional states shift the relationships between features, how lighting choices amplify or soften the dimensional qualities this view offers. The three quarter angle remains endlessly rewarding precisely because it captures faces as they actually appear in life—turned, engaged, present in three-dimensional space rather than flattened into frontal display.
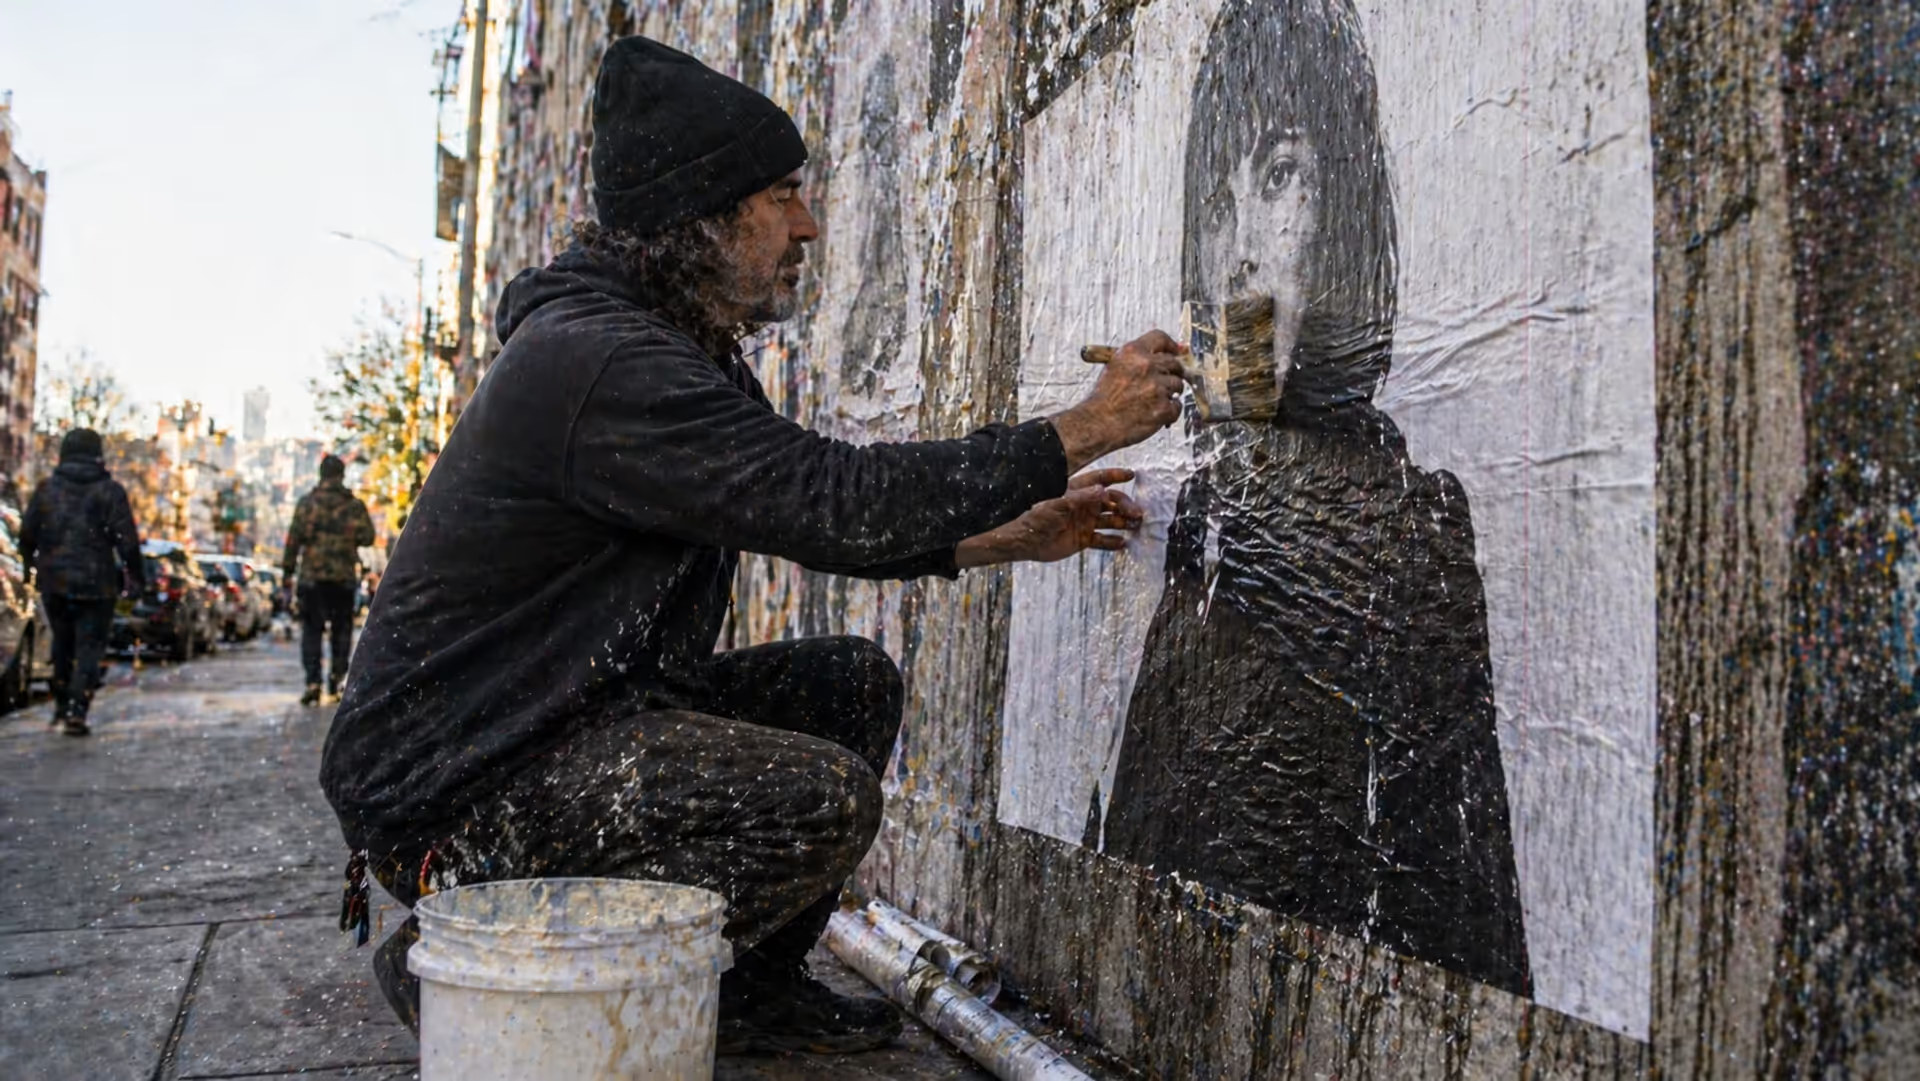
Master the wheatpaste street art technique with this complete guide covering adhesive recipes, poster installation methods, material selection, and legal considerations. Learn to create durable wheat paste art installations using affordable supplies and proven application techniques.
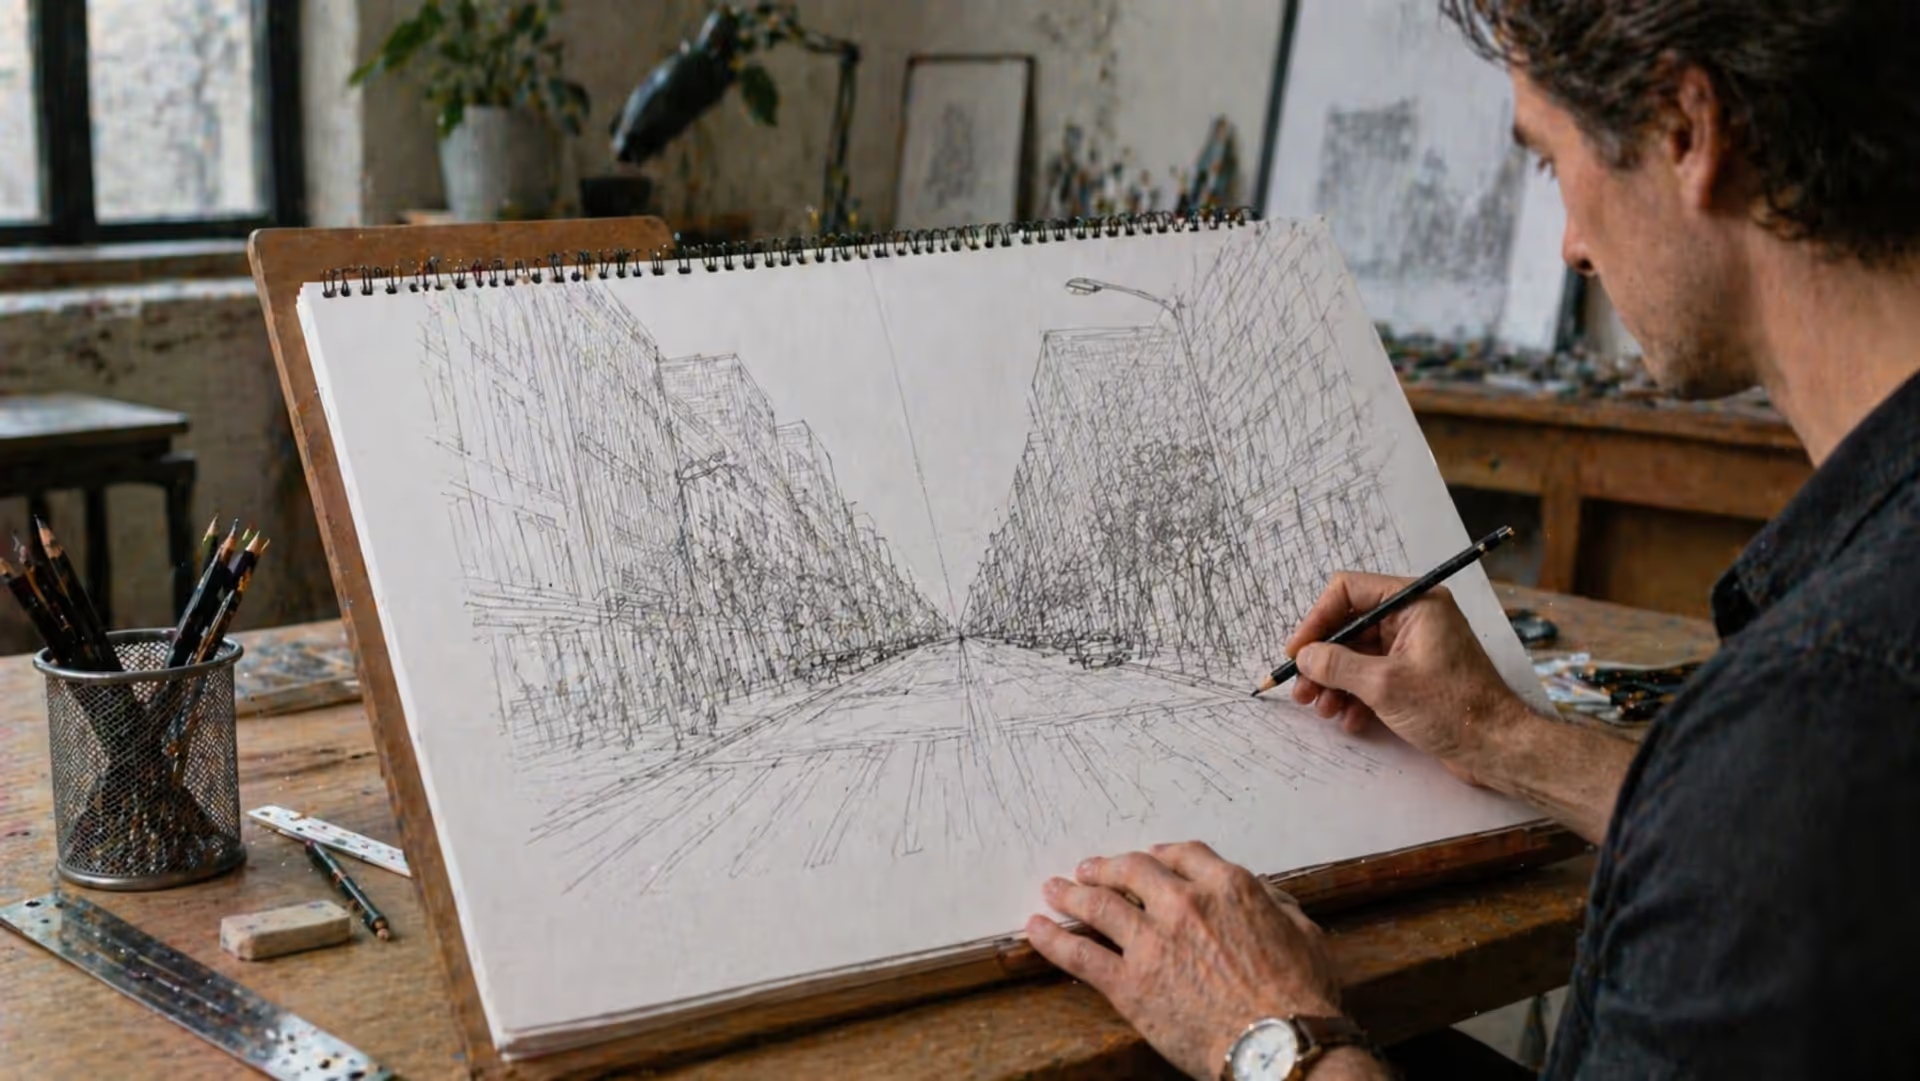
Perspective is the set of techniques artists use to represent three-dimensional space on a flat surface. It governs how objects appear smaller as they recede, how parallel lines converge toward a single point, and how atmospheric conditions affect color and clarity across spatial planes.
Stippling creates stunning artwork using only dots. This comprehensive guide covers everything from basic dot shading methods to advanced illustration techniques, including tool recommendations, step-by-step tutorials, and common mistakes to avoid.
The paper crane carries profound significance beyond its folded form. Discover how this Japanese symbol influences contemporary design, from geometric principles to visual metaphors, and learn the cultural context behind 1,000 cranes, peace symbolism, and minimalist aesthetics.
The content on this website is provided for general informational and educational purposes only. It is intended to explain concepts related to digital design, visual art, color theory, art techniques, design principles, and design history.
All information on this website, including articles, guides, and examples, is presented for general educational purposes. Creative outcomes may vary depending on individual skill, tools, and practice.
This website does not provide professional design services or guarantee results, and the information presented should not be used as a substitute for formal education or professional consultation.
The website and its authors are not responsible for any errors or omissions, or for any outcomes resulting from decisions made based on the information provided on this website.